Gutter guards can help keep your gutters in top condition and make cleaning less frustrating. However, there are ways to keep your gutters free from getting clogged, and you won’t have to go up the ladder to clean them by installing gutter mesh. So, for the question, ‘how to install gutter mesh’, we will give you the steps.
The two most popular products or types of gutter guard systems are the snap-on gutter guards and screw-fastened guards.
Among do-it-yourselfers, the preferred choice is the snap-on gutter guards. They are easy to install, albeit they are not as durable as the screwed-on options.
To answer the question ‘how to install gutter mesh‘ depends on which type you choose. The snap-on is a quick project, unlike the other one where you will have to drill pilot holes and fasten the guards with screws onto your roof.
For this article, we will cover the instructions for snap-on gutter guards.
Materials:
Extension ladder
Measuring tape
Putty knife
Tin snips or utility knife
Mitre box or protractor (optional)
Roofing cement (optional)
Step 1
As in any project, always read the instructions before installing your product. The specific steps vary depending on the design, and improper installation of your guards could result in a malfunction of your gutters. Additionally, you will void your warranty if you do not follow the manufacturer’s installation instructions.
Step 2
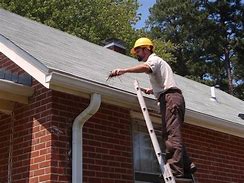 Slide the rear edge of the gutter mesh section under the roof. Align the guard section with the roof line, and then insert it under the roof while raising it. Continue sliding the gutter guards until you reach the end of the first gutter guard section.
Step 3
Attach the front of the section to the lip of the gutter. As a general rule, align the outer edge of the gutter guard section with the edge of the gutter. Next, pinch the snapping mechanism onto the lip of the gutter to engage the gutter mesh.
Continue until you have finished snapping into place the rest of the gutter guard section.
Step 4
Cut the mitre joints to connect the hooded covers to the corners. Use a mitre box or a protractor to measure a 45-degree angle at the end of a protection section. Mark the angle, then cut off the end with shears or a knife.
Step 5
Cut the end of the last guard section with a utility knife or shear. When you are near the end of the gutter run, measure the distance between the previous and the end guard section. If it is shorter than a full guard section, cut one that matches that length and snap it into place. Use roofing cement to joint two cut pieces of the gutter guards.
So, there you have it. Your question ‘how to install gutter mesh’ has just been answered. Order your gutter guards now.